Welcome to a concise hub for red light therapy paired with guided practice. This intro explains how light interacts with cells, why some devices use red while others add near‑infrared, and how sessions differ by target—skin or deeper tissue.
Start slowly: for face work try about five minutes at 4–6 inches, a few times per week. For muscles or joints, near‑infrared often runs six to twelve minutes. Avoid more than two cycles per area in 24 hours and space sessions by hours.
Device choice matters: aim for realistic irradiance and match wavelength to goals. Travel devices usually offer 110–240V and ~38 Wh batteries; check airline rules before packing. Safety tips include avoiding direct gaze, using eye protection when beam hits eyes, and consulting clinicians for pregnancy, nursing, or children.
How this differs from normal meditation: RLT practices add gentle warmth and visible light that pair with breathwork. That sensory layer can deepen focus while supporting skin and recovery goals.
Key Takeaways
- Red light targets surface skin; near‑infrared reaches deeper tissues.
- Short face sessions ~5 minutes; deeper tissues 6–12 minutes.
- Limit cycles per area and space sessions by hours.
- Choose devices for real power specs, not marketing claims.
- Follow safety: avoid direct gaze and consult clinicians for special cases.
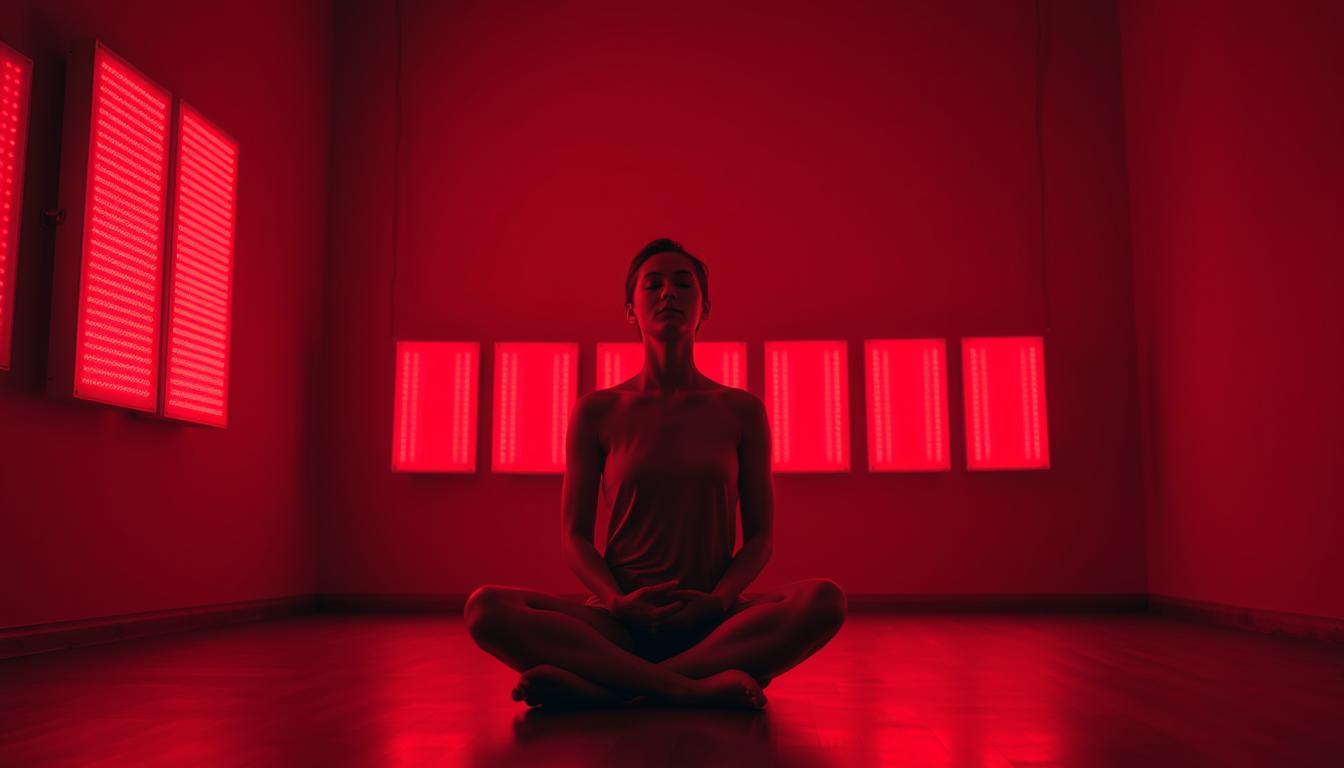
What Are RLT Meditations and Why They’re Different from Standard Sessions
A guided practice that adds red or near‑infrared light can shift a standard session into a therapeutic ritual.
Definition: RLT meditations blend red light therapy exposure with breathwork and simple mindfulness cues. The light runs quietly in the background while audio prompts guide slow inhales and exhales. This pairing supports mitochondrial function and circulation while keeping focus on calming awareness.
How this differs from classic meditation is simple. Standard sessions rely mainly on cognitive focus and respiration. Here, visible or near‑infrared light adds a targeted, low‑level stimulus that can support skin and deeper tissues during the same short practice.

Who benefits and common uses
- Skin goals: tone, fine lines, surface healing.
- Pain and recovery: joint and muscle support after exercise.
- Relaxation: ritual helps consistency and stress reduction.
| Mode | Depth | Best use |
|---|---|---|
| Red light | Surface (skin) | Complexion, fine lines, dermal circulation |
| Near‑infrared | Deeper tissues (muscle, joint) | Pain relief, recovery after exercise |
| Combined | Layered depth | General health, mixed targets |
How Does It Work? The Science Behind Red and Near‑Infrared Light
Light at precise wavelengths talks to mitochondria, boosting cellular energy and circulation.
Photobiomodulation 101: specific red and near‑infrared wavelengths enter skin and interact with mitochondria inside cells. That interaction helps produce more ATP, which is the chemical energy tissues use for repair and function. Higher ATP often means faster recovery, better signaling, and more resilience.
Improved local blood flow and calmer inflammatory signaling follow increased energy. These shifts help skin heal and muscles recover. Many studies and ongoing research report benefits for skin quality, pain relief, and post‑exercise recovery, though results depend on device dose and routine.

Wavelengths and depth
Visible red typically sits around 620–750 nm and works well for surface targets like skin. Near‑infrared starts above ~800 nm and penetrates deeper, reaching muscles, tendons, and joints. Match wavelength to goal: visible red for complexion, NIR for recovery.
LED vs laser
LED panels spread energy over a wide area at lower intensity per point. That makes them safe and easy for at‑home light therapy. Lasers focus power in a tiny spot and can deliver higher intensity. For most home users, LEDs offer hands‑free coverage, practical positioning, and good safety.
“Photobiomodulation boosts cellular energy and supports circulation, with broad evidence across skin and recovery studies.”
| Mode | Wavelength | Best target |
|---|---|---|
| Red light | ~620–750 nm | Surface skin, complexion |
| Near‑infrared | >800 nm | Muscle, tendon, joint recovery |
| LED panels | Mixed red & NIR | At‑home coverage, safety, hands‑free use |
Practical takeaway: match wavelength to target, start with short sessions, note changes over 24–48 hours, and build consistency so light effects add up.
Choosing Your Device: Power, Irradiance, and Real‑World Use
Start by checking how much usable light will reach the skin at a practical distance.
Irradiance (mW/cm²) measures strength of light at the skin and anchors session timing. Aim for devices that state irradiance at a clear distance so you can calculate treatment minutes.
Understanding irradiance and why accuracy matters
Irradiance tells you how much usable energy arrives per square centimeter. That value sets dose and session length, so accuracy matters more than peak brightness.
Ideal power ranges
For most meditative sessions, about 50–80 mW/cm² at working distance hits a practical sweet spot. A 100 mW/cm² upper limit is reasonable; higher numbers rarely improve outcomes and may shorten a comfortable session.
Measurement myths: solar meters vs spectrometers
Some brands report inflated values using solar meters. Spectrometers or laser meters give truer readings across wavelengths. Remember: midday sun averages ~100 mW/cm², so extreme specs aren’t always better.
“Technique and consistent placement beat chasing the highest spec on a sheet.”
| Method | Trust level | Practical tip |
|---|---|---|
| Spectrometer | High | Use for wavelength‑specific irradiance |
| Laser meter | High | Good for spot checks on panels |
| Solar meter | Low | May inflate readings—ask for stated distance |
What Device Should I Use for RLT Meditations?
Pick a device by matching its light output to the body goal you plan to target.
Match mode to goal: visible red works best for skin targets like tone and fine lines. Near‑infrared reaches deeper and suits muscles, joints, and recovery. If a routine mixes face and recovery, choose a unit with selectable red and NIR or a combined mode for flexibility.
Portability and placement matter: aim for hands‑free setups so breathwork stays central. A tabletop stand fits face sessions; a floor or folding stand helps lower‑body sessions. Beam window size should cover the treatment area so you relax without shifting mid‑session.
- Face distance: 4–6 inches balances dose and warmth.
- Deeper tissue: move slightly closer while watching comfort.
- Large areas: choose a mid‑sized panel and use a timer for even exposure.
- Keep dark fabrics out of the beam path; they trap heat and reduce effective delivery.
| Goal | Recommended mode | Practical tip |
|---|---|---|
| Skin tone, fine lines | Visible red | Tabletop stand at 4–6 inches |
| Muscle, joint recovery | Near‑infrared | Floor stand; slightly closer distance |
| Mixed routines | Combined red & NIR | Selectable modes for one device |
| Travel or on‑desk use | Portable panel with battery | Wider beam window for hands‑free practice |
Practical rule: start with your goal, pick matching wavelengths, set up for hands‑free practice, and adjust distance a few inches until comfort and warmth feel right.
How Long Are the Tracks and Sessions?
Session length and track design shape how light and breathwork fit into daily routines. Clear timing helps you stay consistent and avoid overexposure. Below are practical ranges and simple rules for safe, effective use.
Typical formats and minute ranges
Face work: most facial red light therapy tracks run about five minutes. This pairs well with a short breathwork guide and fits into morning or evening routines.
Deeper tissues: for knees, shoulders, or hamstrings plan for six to twelve minutes per cycle. Start at the low end and watch for warmth or sensitivity.
Frequency, spacing, and practical tips
Avoid more than two cycles over the same area within 24 hours. Space sessions by several hours and split face and body work across morning and evening when combining in one day.
- Begin with shorter tracks during week one, then add one or two minutes if recovery feels normal.
- Use a device timer or guided track so you can stay present without watching the clock.
- Five steady minutes most days beats sporadic long marathons; consistency supports better outcomes.
“More is not always better—light has a biphasic dose response, so moderate, repeatable sessions often produce the best results.”
Dose, Distance, and Time: Getting Your Light “Just Right”
A simple math rule tells how much energy each treatment actually delivers.
Dose (J/cm²) = Power Density (mW/cm²) × Time (seconds) × 0.001. This number is how much red light therapy your skin or muscle receives during a session.
How distance alters irradiance
Moving a device an inch or two back cuts irradiance quickly. Backing up lets you extend minutes for comfort while keeping dose steady.
Biphasic dose response: find the sweet spot
Too little light shows slow progress. Too much can blunt benefits or irritate sensitive skin. Aim for ~50–80 mW/cm²; treat up to ~100 mW/cm² only if comfortable.
Adjusting minutes and sessions without overdoing it
Limit exposure to no more than two cycles per area in 24 hours and space sessions by several hours. If results lag after a few weeks, change one variable: add a minute, reduce distance, or increase frequency—don’t change all at once.
“Dose is how much light you get; track distance, time, and comfort so treatments stay consistent.”
- Calculate dose with the simple formula before a session.
- Segment large body areas into shorter passes for even coverage.
- Watch warmth; heat signals a need to reduce distance or time.
How Is This Different from Normal Meditation?
RLT meditations layer a mild, purposeful physical input onto standard breathwork and focus.
Cellular energy and circulation: red light therapy can stimulate mitochondria, supporting ATP production while breathwork calms the nervous system. That uptick in cellular energy often shows up as improved tissue responsiveness or a gentle sense of suppleness after a session.
Near‑infrared adds a subtle, warm sensation that signals increased local blood flow. This circulation boost can enhance nutrient delivery and help recovery during the same short practice window used for mental calm.
Sensory considerations: visible red provides a soft glow; NIR may feel warm without strong visual cues. Both change the sensory palette from a purely internal focus to a mixed internal‑external awareness.
Practical tips for comfort and safety: avoid direct gaze into LEDs and use provided goggles when eyes fall inside the beam. Set up a hands‑free position so posture stays steady and fidgeting stays low. If minimal stimulation is preferred, choose NIR‑only mode for less visual input while preserving deeper tissue effects.
“A gentle light layer can act as an anchor for attention while adding real cellular and circulation benefits during a short, focused practice.”
- Traditional sits use breath and attention; this method adds measurable cellular support.
- Increased ATP and circulation may make body tissues feel more responsive after sessions.
- Eye comfort and steady placement matter—adjust distance or time if brightness or warmth distracts.
Safety First: Eyes, Heat, Skin Sensitivity, and Special Populations
Comfort and safety hinge on a few easy rules when combining breathwork with red light therapy.
Eye comfort and protection
Protect vision by avoiding direct gaze into bright LEDs. If the beam crosses your face during a session, wear the supplied goggles for both comfort and safety.
If eyelids feel sensitive, close eyes and move the device back a few inches. That lowers intensity while keeping posture relaxed and steady.
Heat and skin: distance, clothing, and fabrics
Near‑infrared may register as gentle warmth. Manage that heat by stepping back, shortening minutes, or angling the panel so skin feels pleasantly warm, not hot.
Never run sessions through clothing or under blankets. Dark or dense fabrics trap heat, irritate skin, and reduce effective delivery of light therapy.
For sensitive skin, start with shorter exposure. If redness lasts, pause a day and resume with greater distance or fewer minutes.
Pregnancy, nursing, and children
Research in pregnancy and nursing is limited. Consult a clinician before starting treatment while pregnant or breastfeeding.
Children should be supervised. Follow medical guidance and keep sessions brief and gentle for younger people.
“Safe, comfortable practice is the foundation for long‑term consistency and benefits.”
- Protect eyes by avoiding direct gaze; use goggles when eyes sit inside the beam.
- Close eyes and increase distance if eyelids feel sensitive.
- Manage heat: step back, shorten time, or change angle for comfort.
- Avoid fabrics that trap heat; run sessions on bare skin or thin garments only.
- Consult a clinician for pregnancy, nursing, or pediatric use and supervise child sessions.
When Will I See Results and What Should I Expect Over Time?
Visible shifts often arrive slowly, not overnight: expect a gentle build over weeks with regular sessions.
Consistency pays off: most face routines using red light therapy show noticeable glow and texture changes in about six to eight weeks. For fine lines, wrinkles, and collagen support, cumulative exposure matters more than dramatic single sessions.
Pain, inflammation, and recovery
Some people notice local relief or improved range of motion sooner. Research and studies suggest light therapy can help modulate inflammation and support tissue recovery, but outcomes vary by target, dose, and routine.
Troubleshooting if progress stalls
- If no benefits after three to four weeks, change one variable: add one minute, move an inch closer, or add one extra weekly session.
- Avoid raising intensity and minutes at once because of a biphasic dose response—too much can blunt gains.
- Track sessions and take weekly baseline photos under the same lighting to spot small changes in skin or body tone.
“Patience and steady use usually produce the most reliable results; small, repeatable steps beat occasional overuse.”
| Goal | Typical timeline | Quick tip |
|---|---|---|
| Skin tone & collagen | 6–8 weeks | Keep minutes steady; weekly photos |
| Pain & inflammation | Days to weeks | Pair with movement; track soreness |
| Recovery after exercise | 1–4 weeks for short gains | Use consistent post‑work sessions |
At‑Home Routines: Practical Ways to Use Red Light in Your Day
Small, regular light sessions slide easily into daily habits and add measurable benefits.
Morning glow: Set a panel 5–6 inches from the face and run five minutes of red light therapy while doing a short box‑breathing track. This wakes skin and mood without taking time from a routine.
Movement stack: During yoga or mobility, position combined red near‑infrared light near tight hips or hamstrings. Hold gentle stretches while the light supports circulation and local energy.
Training and recovery: Use NIR before and after exercise on target muscle groups—quads for leg day, shoulders for push work—to warm up and aid recovery.
Workday and wind‑down: For a midday reset, place a panel near feet or lower back. A few minutes of NIR on the back of the neck a couple hours before bed can ease tension and help calm.
“Think minutes, not marathons: short, consistent sessions across rotating areas keep progress steady and safe.”
| Routine | Mode | Placement | Practical tip |
|---|---|---|---|
| Morning | Red light | Face, 5–6 in | 5 minutes + breathwork |
| Movement | Combined red & NIR | Hips/hamstrings | During stretches |
| Post‑exercise | NIR | Working muscle | Before & after training |
| Travel | Portable panel | Carry‑on / hotel | Pack like a laptop; check battery rules (~38 Wh) |
- Rotate target areas through the week to avoid overdoing any one area.
- For travel, treat the device like a laptop at security and confirm airline battery rules and plug adaptors.
- Keep a checklist: timer, goggles, short track—so sessions start and end smoothly.
The Ultimate FAQ: Everything You Need to Know About RLT Meditations
Brief recap to help turn reading into a repeatable plan. Follow small, steady steps for reliable results without overdoing minutes or intensity.
Sessions: face work runs about five minutes at 4–6 inches. Deeper tissues take six to twelve minutes. Space sessions by several hours and avoid more than two cycles per area per day.
Devices & power: match mode to goal — red light for visible skin targets, near‑infrared for joints and muscles. Aim for realistic irradiance near 50–80 mW/cm² and treat 100 mW/cm² as an upper practical limit. Pick a hands‑free setup so breathwork stays central.
Safety: never stare into LEDs; if eyes sit inside the beam, wear goggles. Manage warmth by stepping back a few inches and never run sessions through dark fabrics.
- Results: expect visible skin changes in six to eight weeks; tweak one variable at a time if progress stalls.
- Dosing: distance reduces intensity — adjust minutes and keep notes so you can reproduce what works.
- Routines: anchor sessions to habits — morning face work, pre/post workout NIR, short evening neck or back wind‑down.
- Troubleshooting: if over‑warmed or sensitive, cut minutes or back up a few inches before the next session.
“Bookmark this page on our website and use skip content links when quick answers or safety reminders are needed.”
Conclusion
Finish by choosing steps that make light work part of daily care. Pick a device and mode that match goals, set a short, repeatable routine, and protect eyes and skin for calm sessions.
Start slow. Use red light for surface goals and near‑infrared for deeper recovery. Pair breathwork with light therapy while noting minutes, distance, and comfort so ATP production and cellular response can build.
Expect visible skin changes in about six to eight weeks. Track progress with photos and notes, and make small adjustments rather than big jumps if results stall.
Favor honest devices with realistic power ranges. Manage warmth, respect spacing rules, and combine gentle movement for whole‑body support and steady healing.
Final step: treat this guide as a living reference. Revisit dosing reminders and routine ideas, consult clinicians for special cases, and enjoy a few quiet minutes that support body and calm every day.